Svelte: How to create a Dynamic Table Component
Svelte is a Javascript compiler that optimizes the code and has a great performance. On the official website, there is a tutorial that explains Svelte’s step-by-step. By the way, if you just want to see the completed code and figure it out by yourself, go to the Svelte Repl for this article.
Without further ado, let’s create our first component, which will be a table where we’ll apply the table data and style dynamically.
To follow through with this article, the svelte REPL is enough: SVELTE REPL.
Adding a new file
To add a new file click on the plus sign on the files bars of the REPL:


Afterward, add a name for the file, which I’ll call it: Table.svelte. It is important to start with a capital letter so that it diverges from other HTML elements.
Table Structure and Content
To create a table to pass that data, we’ll go to use HTML to build its structure, and after that, we’ll apply Javascript to dynamically change our table content. So, create the body and table elements using their tags:
Table.svelte
<body>
  <table>
    <thead>
      <tr>
        <th></th>
      </tr>
    </thead>
    <tbody>
      <tr>
        <td></td>
      </tr>
    </tbody>
  </table>
</body>
Check this article to understand more about tables: W3SCHOOL
The structure is completed, but it lacks the data. The default data will be created with “Lorem Ipsum”, which generates random Latin expressions. We could put this data directly in the table, however, by doing so, it removes all the dynamism intended in this article. In order to have the possibility of changing this data dynamically, it is necessary to have a place in the computer’s memory to store it, and in order to be able to access it quickly, and this place is called: Variable.
Variable
A variable references a place in memory where the data is stored. In this example, we’ll use an array of string objects. An array is a list of values. An object, at this moment, can be considered as key and value pairs. And a string is a type of data used to store a sequence of characters, in other words, a string is a type of data used to store words, texts, symbols, and so forth.
Check this article to learn more about variables and data types: W3SCHOOL
Iterating over the table data
In our program, between the script tag( used to write javascript code in it), we’ll create a default variable to pass it to the table. I’ll name it tableData, but the name is completely up to you, and the variable will receive an array containing 2 objects with 3 key-value pairs for each object. Check it bellow:
Table.svelte
<script>
  let tableData = [
    {
      “vitae” : “dolorem”,
      “lectus” : “ipsum”,
      “quisquam” : “quia”
    },
    {
      “vitae” : “amet”,
      “lectus” : “consectetur”,
      “quisquam” : “adipisci”
    }
  ];
</script >
This is the data that we’ll be using. In our table, the keys are the columns heading, the values are the rows, and its data the cells. In order to pass our variable content to the table, we’ll use a loop structure. A loop structure allows us to iterate over blocks of code, over and over, until a condition is met. So it can iterate over our dataTable array to extract the object keys to use as column headings and the values to use as rows to fulfill the cells. The Svelte loop structure, “each block”, receives an array, and as options, an index, which refers to the position of the element inside an array, and an identifier to specify the element in the DOM.
To get the data of the keys and use it as the column heading, a function receives an object and extracts its keys from the first object. Inside the <thead> element, create an each loop that extracts the keys values and passes them to the <th> element:
Table.svelte
(...)<thead>
  <tr>
    {#each Object.keys(tableData[0]) as columnHeading}
      <th>{columnHeading}</th>
    {/each}
  <tr/>
</thead>(...)
Ps.: Right now, you aren’t going to see anything, because the table wasn’t imported by the App.svelte file yet.
Now, let’s create our table body. To do that, we’ll use a nested loop, which basically is a loop inside another iterating structure. In the first one, we’ll be creating the rows, and in the second loop, we’ll iterate through the rows and we’ll extract the data for the cells. Check the code below:
Table.svelte
(...)<tbody>
  {#each Object.values(tableData) as row}
    <tr>
      {#each Object.values(row) as cell}
        <td>{cell}</td>
      {/each}
    </tr>
  {/each}
</tbody>
CSS style
Now that we have created our table, let’s apply some basic style using CSS:
Table.svelte
<style>
  table, th, td {
    border: 1px solid;
    border-collapse: collapse;
    margin: 10px;
  }
</style>
Export and Import
Our table is ready, now we need to export the variable tableData, by inserting the export keyword before the variable declaration:export let tableData Also, we need to import it to App.svelte. To do that, in the App.svelte, between the <script> element, write this down:
App.svelte
<script>
  import Table from ‘./Table.svelte’;
</script>
Now that the table component is imported, it can be used as an HTML element. Beneath the script closing tag, we can implement it, like this:
App.svelte
(...)<Table/>
Now you should be seeing the table with its default values.
Changing Values Dynamically
Before change the values, first, think about the subject of your table.You can choose whatever value you want. Mine is about student’s information, containing their names, ages, and their favorite subject. To manage our data in an organized way, we’ll create a Svelte store. To do that, create a new file, my file name is “data-store.js” . Inside the file, we’ll import the writable store module from svelte; create a variable with the values we want to use in our table; and export it:
Store
data-store.js
import { writable } from 'svelte/store';export let studentsArray = writable([
  {
    "Name" : "Maria",
    "Favorite Subject" : "Math",
    "Age" : 14
  },
  {
    "Name" : "Jose",
    "Favorite Subject" : "Science",
    "Age" : 13
  },
]);
In the App.svelte, we’ll import the store and pass its values to the <Table/> element:
App.svelte
(...)import { studentsArray } from './data-store.js';(...)<Table tableData={$studentsArray}/>
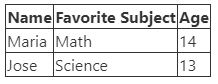
You should be able to see the values in your table, otherwise, check this REPL to help find the error. Mine’s on the left.
Component Completed
Now that we have our component, we can reuse it anywhere we want, the only thing you need to do is call it again at App.Svelte. To exemplify, I’ll create a new table, that contains the name of a few colors and their HEX color code. So, at data-store.js file, I’ll export another variable with its data and at the App.svelte file, I’ll import it and pass it to a new Table’s element, just like before:
data-store.js
(...)export let colors = writable([
 {
  "Name" : "Cyan",
  "HEX" : "#00FFFF"
 },
 {
  "Name" : "Yellow",
  "HEX" : "#FFFF00"
 },
 {
  "Name" : "Blue",
  "HEX" : "#0000FF"
 },
 {
  "Name" : "Lime",
  "HEX" : "#00FF00"
 },
 {
  "Name" : "Red",
  "HEX" : "#FF0000"
 },
 {
  "Name" : "White",
  "HEX" : "#FFFFFF"
 },
 {
  "Name" : "Black",
  "HEX" : "#000000"
 },
])
App.svelte
(...)import { studentsArray, colors } from './data-store.js';(...)<Table tableData={$studentsArray}/>
<Table tableData={$colors}/>
Reusing the component
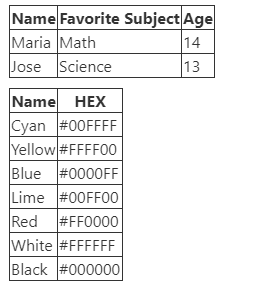
And just like that, we create a new table, with a different number of columns and rows. We can use this component in other applications or web pages, only by importing the component and using it as an element.What comes next?
Our table is ALMOST completed, we still need to apply a more suitable style to those tables, but more importantly, applying it dynamically, using Svelte and CSS.
